top of page
AutoPasser
As a hardware designer within an interdisciplinary team of eight mechanical and electrical engineers, I contributed to the development of a unique hockey passing machine for our client. Throughout the project, I gained valuable insights into diverse design facets, including design of the chassis, remote, LCD screen GUI, LCD screen mount, and branding elements through extensive research and iterative prototyping.
Software: Onshape, Adobe Illustrator, Adobe XD
Skills: Design for Assembly, Design for Manufacturing, Sheet Metal Design, SLA/FDM 3-D printing, laser cutting
June 2023
Background

Generate
Generate is Northeastern University's student-led product development studio that connects engineers, developers, and designers with industry clients to develop prototypes that will take ventures to the next stage.
Find out more about Generate here

AutoPasser
AutoPasser was a Generate client beginning Fall '22, and the project was continued into Spring '23 with a new team of four mechanical engineers, two electrical engineers, a hardware designer (me), a project lead, and a technical lead I worked on a mix of mechanical engineering and UI/UX design with my main contributions being the design of the chassis, remote, LCD screen GUI, and branding. We wrapped up the year long project at the end of the semester and handed it over to the client
Final Report PDF
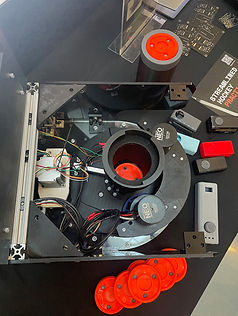
Chassis
Given the numerous mechanical and electrical components in motion on AutoPasser, I was assigned the responsibility of creating a chassis that would minimize potential risks, represent the brand of AutoPasser aesthetically, and prioritize human-centered design.

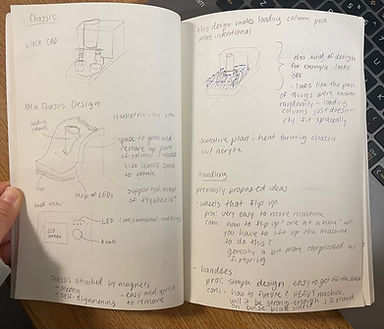
Above are early sketches of the chassis where I brainstormed different shapes, concepts, color, material, finish, etc.

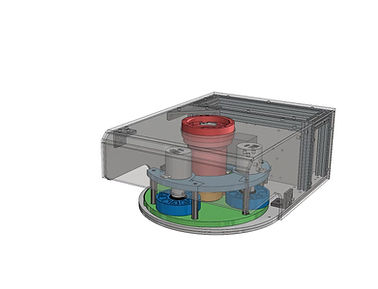
Above is a rendering of AutoPasser. We utilized bent black acrylic with matte black coating which gave the machine a clean and modern finish. The acrylic sheets we used allowed us to design the entire chassis as sheet metal in CAD which we then laser cut and bent in-house.
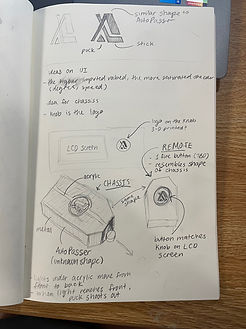
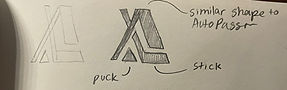
Remote
In response to our client's request for wireless communication with the main mechanism, I developed prototypes for a remote. I worked closely with a mechanical engineer and the two electrical engineers to ensure my designs were compatible with the mechanical and electrical requirements of the remote.
Sketches
Sketches from the first remote prototype to get a feel for user experience (no electrical integration yet)


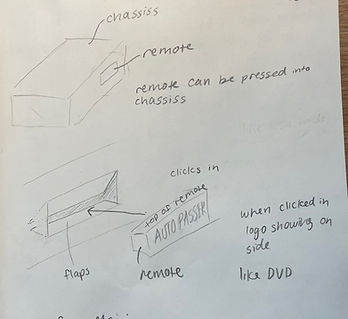
After finalizing my sketches, I handed off the design to another mechanical engineer on the team to CAD.

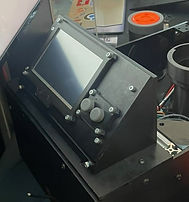
LCD Screen Mount
I designed the LCD Screen Mount for the chassis and accompanying custom brackets for support. I also engineered and tested press-fit knob and button covers for electrical components. The screen was designed to sit at an angle to maximize visibility for the user while the machine sits at ground level

-
Created CAD design for LCD Screen Mount using OnShape
-
Utilized laser-cutting on black acrylic sheets for each panel, applying matte black finish at the end
-
Engineered custom brackets in CAD to reinforce interior of screen mount utilizing FDM printing
-
Designed and tested press-fit knob and button covers for electrical components through SLA printing
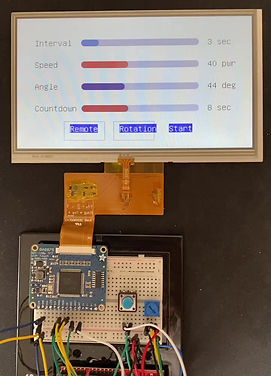
LCD Screen GUI
The GUI is where the user is able to communicate with the mechanism. You input your parameters and the machine will act accordingly with the outputted effects. I designed sketches and created a mock up in Adobe XD. Once the designs were finalized, I worked with the electrical engineers to implement the GUI onto the LCD screen.

My original design was to control the GUI through one potentiometer-button component. Due to varying constraints, we were not able to execute the design exactly as sketched. We pivoted and split the potentiometer and button into separate components as you can see in the video.

Branding
I also took on the task of creating a brand for AutoPasser. This included a color palette, logo, and typefaces.
Colors and Type


Logo


Showcase
We tabled at Generate's Spring 2023 Showcase with an audience of 500 people. Our team provided an overview of the product, responded to questions, and collected feedback.


bottom of page